Monday, September 2, 2013

Chandelier mobile how-to

My daughter has been designing her "princess room" for the past few months.  She doesn't yet have her own room, nor will she for about a year, but dream on, girl.  Luckily for her, I figured out how to make a "chandelier" (a must-have for any princess's bedroom) out of things that were on sale at Hobby Lobby.  Since as usual I forgot to take step-by-step pictures, I'll just post the final product and hope you figure it out.

I started with a wire wreath form.  They only come in dark green, which is obviously not a princess color, so I had to paint mine.  It was a sloppy job but you can't tell with all the stuff on it.  I added some sparkly garland and wrapped it around the wreath, then added the hanging crystals.  These are all found in the Christmas section of Hobby Lobby.  Yeah, I don't know why they have chandelier stuff in the Christmas section, either.  Your guess is as good as mine.

The middle part is actually an ornament that looks like a tiny chandelier.  I didn't make it from scratch or anything.  All you have to do to get it is sift through their 73,000 Christmas ornaments and find one like it. Easy, right? To hang that in the middle, I strung a wire across the wreath and hung it from that.  The wire was gold, so it didn't match the rest, but I don't hear anyone complaining.

And that's it.  Definitely not as complicated as it looks.
 Ignore her expression.  She actually loves it.
 Now we just get to sit in her room and watch it catch light all day!

Sunday, June 2, 2013

Dresser makeover

Hi, I'm Lindsey and I like to have imaginary conversations with furniture.

I also have this superhero complex where I often feel like I'm rescuing furniture from an abused past or a bleak future.  I will find a chair on the side of the road that screams, "Help me!  I lived with three cats and they ripped a hole in my cushion!" or "A fat guy sat on me every day for 20 years.  I just can't take it anymore."

But sometimes I have conversations with new furniture.  I was at Ikea the other day and spotted a dresser that I had seen online before.  It looked so sad.  "Look at me.  Some bachelor is going to take me home and stick me in his room and put an ugly art print and an alarm clock on me.  And he'll only choose me because I'm cheap and have absolutely nothing interesting about my design.  And then after two years when he moves he'll sell me for $5 on Craigslist because I never meant anything to him."  And I said, "Not today, dresser.  I'll take you with me and give you a facelift and a home, and put an original painting on you.  You're going to look like you came from Anthropologie.  And even though my kids may color on you and confuse you for a ladder, you will be loved for the rest of your little life."

Well, here's how it turned out.  I forgot to take "before" pictures, so just imagine a very light unstained pine dresser with wooden knobs.  I started with giving it a coat of dark walnut stain, and I took those little knobs and hand-painted them into cute little flowers.  I love how it makes my room come together.


My daughter and I had a major discussion on how to style the top of the dresser.  She did not want the mask on there.  She kept taking it off and hiding it.

Monday, March 4, 2013

Driftwood jewelry hanger

One of my absolute favorite things about DIYing is that you can take something with sentimental value and turn it into something functional.  I guess you could say that the story of this jewelry holder actually began 2 years ago when my husband and I were on a trip to Washington.  On our way back from the rain forest at Olympic National Park, we stopped by Rialto beach.  I was completely taken with the scenery; fascinated by the lines of the driftwood.  I took a small piece home with me, knowing that I would do something with it, but not knowing what.  
That poor piece of wood sat on my shelf for a couple of years.  A few months ago, after my daughter went through my necklaces for the 824th time, I decided to make a jewelry hanger.  It was a couple of weeks before it occurred to me to use the driftwood, but it was a perfect match.  All I had to do was buy a pack of screw-in hooks, and they went in easily.  I have a pretty ugly bathroom right now, but I do love the beachy theme of my jewelry hanger, and I think it's going to look lovely once we have a nicer bathroom to put it in.


Monday, February 25, 2013

Wire-wrapped earrings

Hello there.  It's been awhile.  I'm not even going to come up with an excuse for my absence, though, because that would be very boring.  I'm here to post about these adorable earrings I made a few months ago.

I had planned to give these to my mom for Christmas, but I gave her an oil painting instead (which was obviously a better present).  I happily kept these for myself and they are my favorite earrings I own.  They were also really easy to make-- I found some earring hooks, these blue glass beads (briolette is the actual term) that had holes drilled across the top, and brass wire.  I used the wire to attach the hooks and then looped it around the briolette several times to finish it off.  The only thing I would have changed, though, is that I should NOT have used brass wire.  I had worked with copper wire in the past and it holds its shape nicely; not so for brass.  I became aware of this when I opened the package and the wire sprang out of it like my butt when I take off my skinny jeans.  As you can see, the wire wrapped around the briolettes only loosely-- not at all like the neat, tight wrapping I had in mind.  


Friday, September 21, 2012

Super easy fall decorating

I'm always on the lookout for crafts that are easy enough to do with my daughter.  Today I went to BigLots and bought a few decorative pumpkins for $1 each.  They were pretty cute on their own, but they did look a little cheap, and when I brought them home I realized that I didn't love the colors.  That is when I remembered that I had this paint.  As you can see by the price tag still on it, it was not expensive.  And I think I got it when paints were 40% off (craft stores have sales like that all the time.) 
And painting them was easy enough for Violet to do.  

 Here are the two I did; I applied a pretty thin layer because I liked the different colors to show through. Also, they were much more metallic than they look in these pictures.  They didn't photograph too well.
 Violet applied the paint much more liberally, as 2-year-olds noramally do.
I have used this metallic paint on a couple of different projects and I will say that I am a huge fan.  They also have several different colors, and it would be cool to see how silver or bronze ones turn out.  Happy Autumn!

Saturday, September 1, 2012

A non-commital makeover

Remember this fabric dressing room that I made for my parents' play room last summer?  It actually turned out really well. Unfortunately, kids under the age of 6 don't really care who sees them in their underwear and they think it's fascinating to pull apart PVC joints.  So it was short-lived.
 
But yesterday I bought a new bookcase for my living room and almost immediately decided that it needed something extra.  I had seen bookshelf makeovers where people put wallpaper on the backing, so I decided to try out fabric.  The fabric from the dressing room happened to fit it exactly, so I decided that it was meant to be.  I did have one dilemma, though: I wasn't sure if my husband would like it. I know that most people's husbands could care less about home decor as long as they don't have to sleep in a pink bed.  I do not have a typical husband. 
 
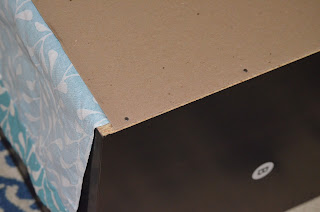
Then a light bulb went off.  I laid the fabric over the back of the shelf, put the backing over it, and nailed it down on the sides but not the top or bottom. The backing held the fabric in place but since the fabric wasn't actually attatched to anything, I could slide it out in case my husband decided he didn't like it. 

 I then stuck it against the wall. Nobody has to know that there is a mess of extra fabric behind it.  Now my toddler can take it over and put all her crap on it.  Wonderful.


Tuesday, June 19, 2012

Chalkboard place cards

This post was originally supposed to be a knock-off of these place cards that I saw in my parents' Williams-Sonoma catalog ($29 for a set of 4).  I now live dangerously close to a dollar store but when I went to look for mini-frames there, they only had them in a chrome finish, and that didn't really accomplish the cute country look I was going for.  So I abandoned the frame idea and went for a different approach to these. 
Williams-Sonoma place cards
 I found some wood plaques for 69 cents each at Michaels.  I got some chalkboard spray paint (about $5 at Lowes) and it was pretty self-explanatory from there.  (Please excuse the smeared chalk and tiny feet in the picture.  My daughter is now 2 and doesn't take naps, so staging good pictures during daylight hours is nigh impossible.  And when she saw the chalk she obviously thought this project was way too fun not to mess with.)


Why Batman?  Well, look at the shape and color of the plaque.  I couldn't stop the "Na na na na na na na na... BATMAN!" from going through my head.
So there you have it, four for less than $8 instead of four for $29.  And you could easily do the little frames if you were to find some in the right size and color.  They would also work great as food labels for a buffet party.  Now I just need to throw a party fancy enough to use them.  It may be awhile before I do.

And as for a product review on the chalkboard paint... it worked fine.  The chalk wiped off cleanly with a damp cloth.  It didn't come off too easily with a dry cloth, but that's probably because my base was made of wood and the chalk got caught in the grain.  That being said, I'm not sure if I could tell the difference between chalkboard paint and black matte spray paint.  I'll try it on another project before making up my mind on this product.