Wednesday, May 25, 2011

Lindsey

Hey. It's Brittany here.  I just wanted to take a minute to brag about LIndsey and her husband.  I have to say, they are just two peas in a pod.  I have a hard time picturing a couple that is better matched than they are.  Both a little quirky (in a mostly good way), artsy, and definitely march to the beat of their own drum.  (A drum that the rest of us weren't even aware existed.

So when they got married they decided (much to my mother's dismay) that they were going to make their own groomscake in the shape of an alligator.  Why an alligator, you ask?  I'm still not quite sure.  Maybe she can explain that one to you.  So they stayed up all night the night before their wedding sculpting, painting (with paintable food coloring - did you know that existed?   I didn't.) I'm pretty sure they could put the Cake Boxx to shame.  And the cake?  Red Velvet, of course.  (haha)

Monday, May 23, 2011

Birthday Bliss

HAPPY BIRTHDAY LINDSEY!!!  All birthdays require ample celebration (meaning lots and lots of good food.)
Our family clebrated my birthday today.  Mom and I stayed up late last night making this cake.  Isn't it beautiful?  Let me just tell you what went into it.  First you make two delicious coconut cakes.  Then you brush them with a lime glaze that I licked out of the bowl more times than I care to admit.  When that is set, you frost it with a cream cheese-coconut frosting and top with toasted coconut.  I almost cried when I ate it.  Make it.  You won't regret it.


Recipe from Food Network

Ingredients

  • 1 cup butter
  • 2 cups sugar
  • 1 teaspoon coconut extract
  • 4 eggs
  • 2 1/2 cup all-purpose flour
  • 1/2 teaspoon salt
  • 1 teaspoon baking soda
  • 1/2 teaspoon baking powder
  • 1 cup coconut milk

Glaze:

  • 1 cup sour cream or yogurt
  • 1 cup sugar
  • 2 limes, zested and juicd

Frosting:

  • 1/2 cup butter
  • 1/2 cup shortening
  • 4 ounces cream cheese
  • 1 pound box plus 1 cup powdered sugar
  • 1/4 cup coconut milk
  • 1 teaspoon vanilla
  • 2 cups shredded coconut

Directions

Preheat oven to 350 degrees F and grease and flour 2 (9-inch) cake pans.
In an electric mixer or using a hand beater, cream butter and sugar until fluffy. Add coconut extract and eggs 1 at a time. In a mixing bowl or on a sheet of parchment paper, combine flour, salt, baking soda and powder. To mixer add coconut milk and flour to creamed mixture alternately, beginning and ending with flour. Pour batter into prepared pans and bake for 25 to 28 minutes. Allow to cool 10 minutes then unmold onto rack(s) over a sheet pan and allow to cool completely.
For Glaze: In a medium bowl combine sour cream or yogurt, sugar, lime zest and juice.
With a bamboo skewer, poke holes in cake and spread glaze on both sides of both cakes. (You won't use all of it.  I saved most and just drizzled it over my slice.) Cover with plastic wrap, chill until ready to frost cake.
In an electric mixer or using a hand mixer beat together the butter, shortening, and cream cheese until well blended and fluffy. Add the powdered sugar gradually at low speed. Beat in coconut milk and vanilla. Frost cake. Coat top and sides with shredded coconut.

Sunday, May 22, 2011

Birthday crafting: magic wands

My family celebrated my birthday this weekend.  Since I'm not 7 anymore, I don't normally have themed birthday parties.  But my mom and I found some giant pixie sticks on clearance at our store, and since there were going to be 6 little kids coming to my party, I had the idea of making them into magic wands as party favors. The lineup of supplies was pretty simple: pixie sticks, ribbon, foam stars,  tape, scissors, and markers.  I just did some ribbon curling and from there it was pretty self-explanatory. 
 Here's how they turned out:

 And they were a HUGE hit.  But I wouldn't recommend telling the kids that they're filled with candy until they are safely outside on the grass, because to kids, it's "fairy dust," which is apparently meant to be sprinkled on anything you want to have magical powers.

Saturday, May 21, 2011

skirt to shirt refashion


So, once upon a time I lived in a town called Macon, Ga.  And as much as I loved all of the people I met, it was not exactly the fashion capitol of America.  So I bought a mid-calf pleated skirt that was two sizes too big.  And I wore it all the time.  I thought it was pretty awesome.  Then I moved to DC.  And while DC is also not the fashion capital of the world, we at least have a Banana Republic.  (Which Macon does not, by the way.)  And I realized that this skirt was far from fashionable.

At any rate, for the past five years, this skirt has managed to evade the Goodwill pile.  I almost threw it out after the zipper broke, but then I found this tutorial by Sarah and knew that this skirt's destiny had changed forever.  If she could turn an outdated pleated skirt into a dress, I could, too!!  The broken zipper kind of got in the way, so I ended up turning it into a shirt instead.

I cut straight across the skirt right where the zipper ended, and then followed the instructions from Sarah's tutorial.  Unfortunately, the neckline was WAY too big, so I simply did a quick gathering stitch all around the neckline, and it ended up being just the right size.  I didn't hem the neckline or the sleeves, partly because I was feeling lazy and partly because I kind of liked the more rugged shape.  (I did put some fray check on the edges so they don't come completely unraveled.)  Although I think it would have been cuter as a dress, I love the way the shirt turned out.  Thanks, Sarah!!

not so much a sewing post

When I was younger, I LOVED art.  In the 4th grade, I went through a dog phase where I would draw (in pastels, thank you) all different kinds of dogs.  Usually I pretended that they were posing for a school picture. (Not really dog-like, but I thought that they were pretty darn awesome.)

Anyway, it's been years since I have attempted any sort of art.  So back in December, I decided to try my hand at simple black-and-white drawings, just to see if I still enjoyed it.  (As it turns out, I do.  Too bad I have exactly zero art supplies.  (This is why these drawings were made on printer paper (stolen from my school's printer - shhh, don't tell) and a black Sharpie.)  I pulled out a few pictures of my nieces and nephews (and one of my parents) and started drawing.

This one I was going to finish and frame for my mom's Christmas present.  As you can see, it is not finished.  (My dad only has half of a head.)  Sorry, mom.  Instead you got clothes (as usual).


Unfinished Annie, tired and in her car seat.


Violet, looking cute as ever.

This one came from my all-time favorite picture of my nephew Devin.  He had just gotten new glasses and a new sweater vest and was leaning over the back of the couch looking so proud.  Love that kid.

striped summer dress


For this dress, I used Martha Stewart's Elegant and Easy Dress instructions.  (It was, after all, my very first time attempting to make clothing from scratch....)  The dress turned out fine, but mostly because I loved the striped fabric and not so much because I loved the way it fit.  So I took my favorite skirt, traced it on the bottom half of the dress, and took in the dress from the waist down.  As you can see, it still has volume at the top (which works well for my figure) but looks much less like I'm wearing a pillowcase.

Friday, May 20, 2011

I love Disney (but not the theme park)

It's true.  I love Disney.  But I don't love Disneyland or Disneyworld.  Or necessarily Walt Disney himself.  But I do love this girl (and read her blog religiously) and she just happens to be named Disney.  With a name like that, she is bound to be a happy person. (and, as it turns out, totally crafty.)

Anyway, she has some fantastic tutorials on her blog, all of which I am trying my best to copy.  (Hers always turn out way better than mine, but even with poor sewing skills, everything is SOOO cute.)

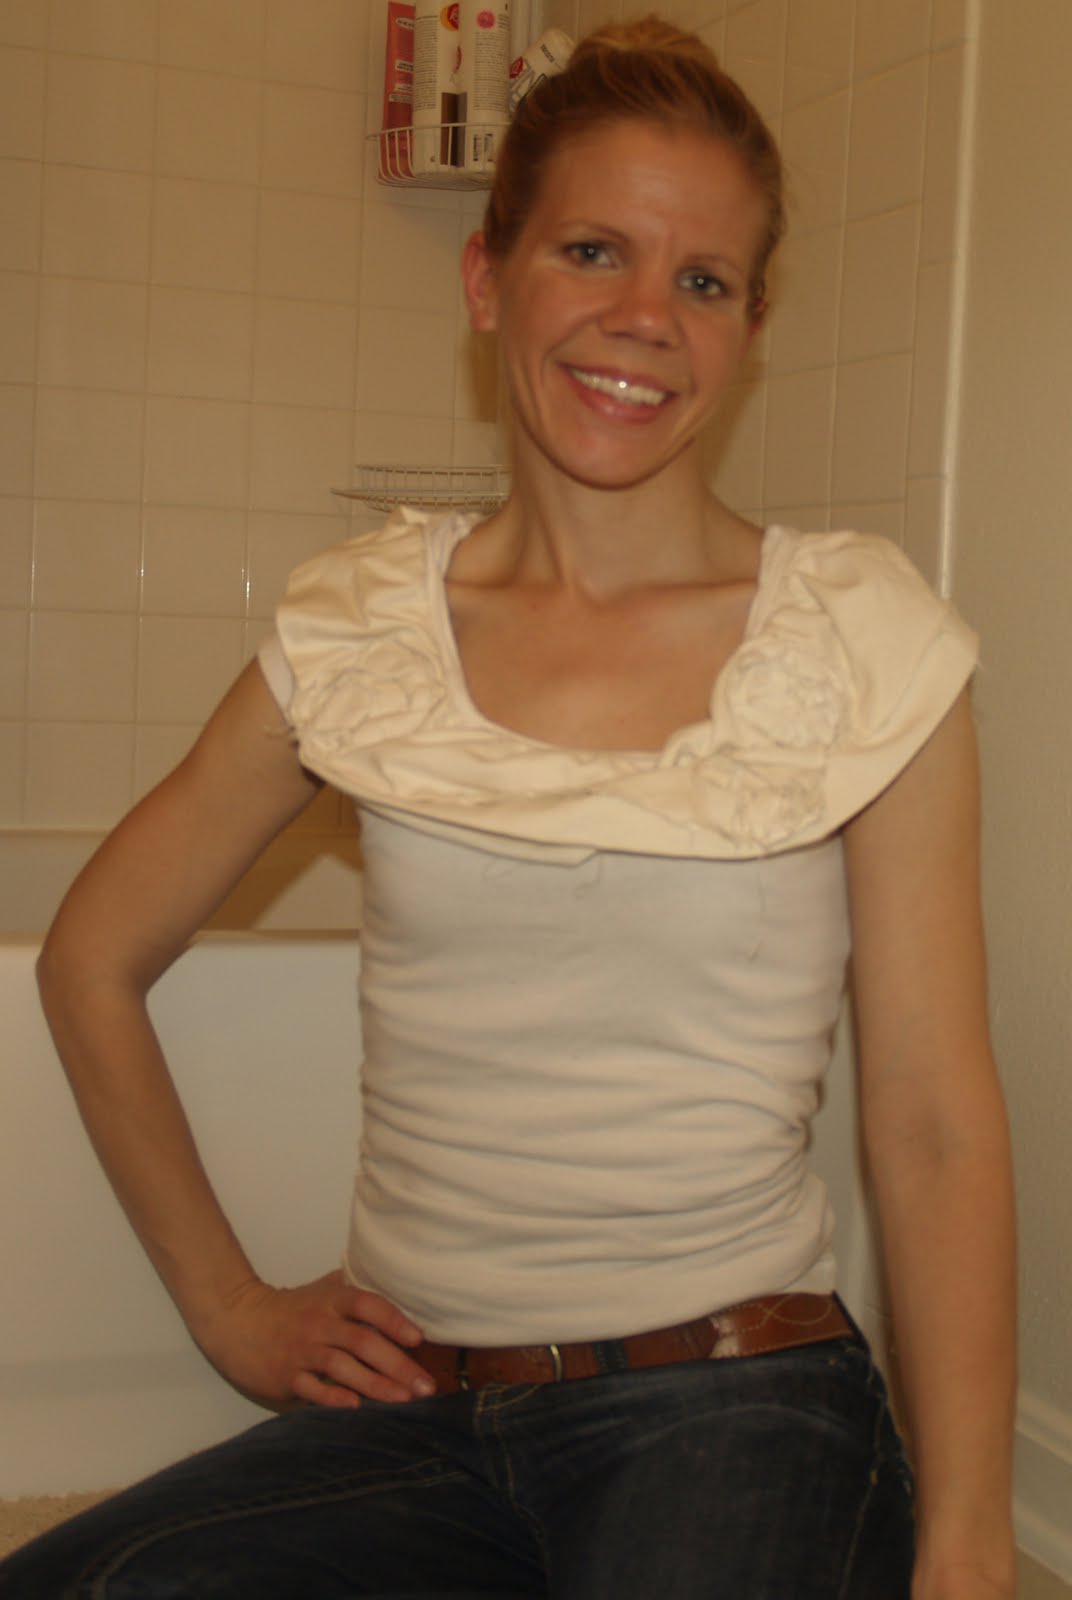
So I made her Gardens at Dusk Tank.  Except I made it a Gardens at Dusk Tee.  (I didn't have a tank on hand, but I did have a white tshirt that had a stain at the top that needed to be covered up.

I used an old sheet to make the flowery collar, because it was there and it was the right color.  (I'm cheap.  I'll use whatever fabric is free.  That's how I roll.)

I love the way this shirt turned out.  I wear it ALL THE TIME. To work, to parties, to bed....   It has become one of my all time favorite shirts.  (You can see that I used a tshirt instead of a tank - the shirt sticks out from the neckline just a bit.  If I were to re-do this, I would probably make the embellishments a little wider to cover that, but the extra sleeve really doesn't look too bad.)


LOVE the way the details with how the extra fabric kind of waves, and the flowers bunched up all around.  I wish I had gotten a picture of the back - that's my favorite part.  


I have a group of students in my third period class (a group of boys, ironically) who are having a contest to see who can most accurately guess which clothes I'm wearing are homemade, and which are store-bought.  This shirt stumped them all.  That's my gauge for an excellent homemade item.  If it looks store-bought, (especially if it looks like it came from Anthropologie, which this one does) you know you have a great homemade item.

(And just in case you couldn't tell, Disney's pictures are WAY better than mine.  Probably because hers were not taken in her bathroom.  And maybe because she lives somewhere where the sun